Halloween is on the way, and that means candy, costumes and crafts. One way to get into the spirit (with less sugar intake) is decorations. Get ready for October with some of these DIY creations.
Monster Eyes
This is an easy decoration to do, which can be made with affordable household items in less than five minutes. All you need are:
Scissors
A pen/ pencil
Toilet paper/ paper towel rolls
Glowsticks
- Draw a pair of eyes onto each paper roll. Make a design that leaves an opening for light to shine through. Use different designs to give some variety.
- Use scissors to cut out the part of the eye that you want to glow.
- Secure a glow stick into each role with tape and either hang or set them together to add a spooky touch to your Halloween decor.
Candy Corn Bottles
This is a decoration that’s great for a subtle holiday touch, without the ghosts and ghouls. Also, it’s a great opportunity to recycle any glass bottles or jars you have around the house.
What you need:
Yellow, orange and white paint
Glass bottles
Paint brushes or craft sponges
Spray glue
Optional:
Loose glitter
Ribbons or borders
- First, paint the bottles white, to cover any labels or markings and wait for them to dry.
- Once dry, paint the middle section orange and wait for it to dry.
- Then, paint either the top or bottom section yellow.
- OPTIONAL: spray the glue onto whichever part you want to highlight and sprinkle glitter. Shake off the excess once the glue is dry.
- OPTIONAL: spray glue onto where each color section meets and add decorative ribbons or borders.
Sugar Skulls
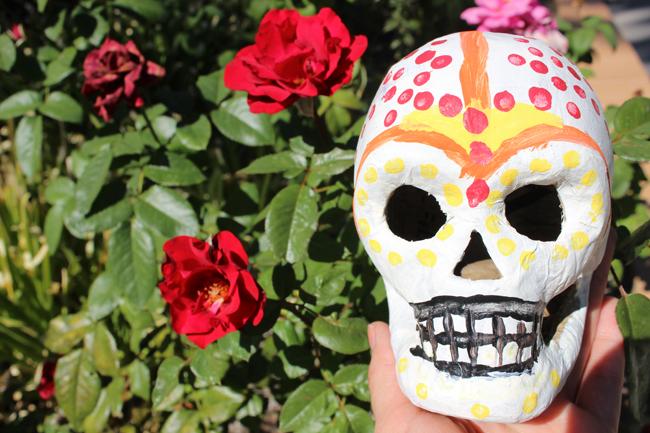
These are a great way to incorporate “Day of the Dead” decorations into your holiday setup. Use as many colors as you want to create a fun and vibrant display that shows another aspect of this popular holiday season.
You need:
Cardboard skull (about $3 at most craft or seasonal stores)
Acrylic paint in multiple colors
Paint brushes
Cotton Swabs (for this design)
- Since the cardboard skulls are brown, paint the entire skull white.
- Use a cotton swab or small paint brush to outline the teeth. In this example, this was done with black paint.
- Use a cotton swab to make dots around the eyes or mouth. *Another common design is to draw flower petals around these areas.
- Mix and match colors and designs to achieve the look you want.
Tin Can-O-Lantern
This is another craft that uses recyclable items commonly found around the house. Make as many as you want to light up your porch or walkway after darkness falls.
You need:
Tin cans (soup cans and coffee cans work great)
Hammer and nail/drill
Tealight candles/ electric candles/ glow sticks
Black paint
Pen/pencil
- Remove all labels and wrappers from the cans. This makes them easier to paint.
- Draw your design onto the can. The most common designs are pumpkins and ghosts, but feel free to get creative! Don’t worry about making it perfect because you won’t be able to see the lines once it’s finished.
- Use the hammer and nail or drill to make holes where the lines are drawn. Think of making your designs look perforated and try to keep the holes equal in distance from each other.
- Once you’ve created your design, paint the can black. You can use any paint, but spray paint is quick and easy. Be sure to do this over newspaper or a tarp to avoid damaging your floor or other belongings.
- Put a candle, light or glow stick into the can and let them shine!
- Set them in a window, walkway or on your porch for an eerie addition to your home decor.